
October 2022
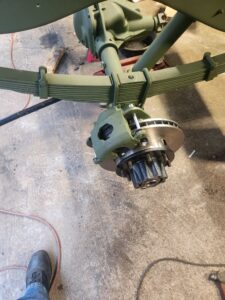
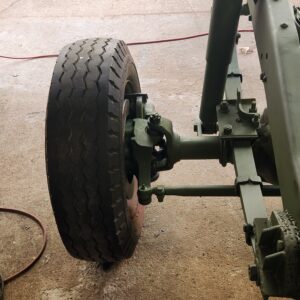
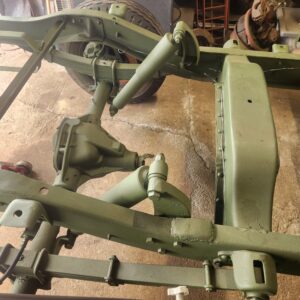
Started working on the rear axle. Back in 2009 I ordered disk brake conversion kits off of that auction site that stated that the kit would fit either a Ford or a Dodge Dana 60 rear axle. The kit uses new rotors and calipers from a Chevy truck. Well, I got around to installing the kit this month. The rotor fits the hubs just fine. But the original bracket for the calipers didn’t work. First the caliper did not fit properly between the opening in the bracket. Secondly, I think the kit was designed for a longer hub as once I put the hub and rotor on and got the nuts tightened to the proper preload, the caliper would not fit onto the rotor. It was like the caliper needed to go back another inch or so. Hmmm I’m thinking the originator of this kit new it would work on a Ford, but was guessing if it would fit a Dodge. Here is how the bracket looked on the axle for the original bolt up. 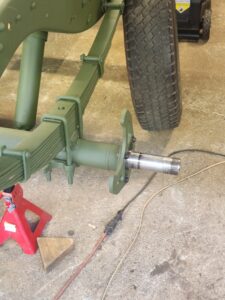 I have to say that the bracket not only did not fit the caliper but the bolt holes for the bracket to bolt to the axle were not quite in the right place and I had to make the larger in order to get the bracket to bolt up. But as I said it didn’t fit right anyway.
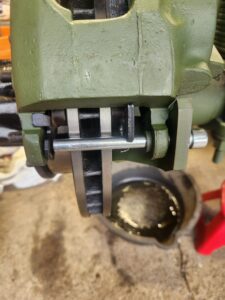
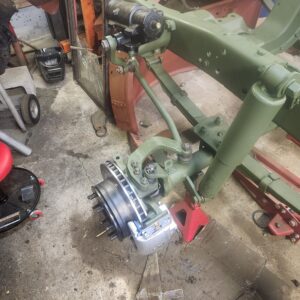
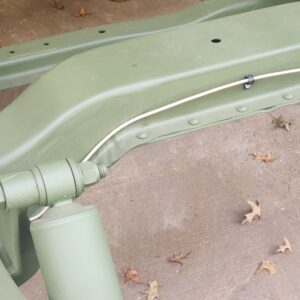
So, I went on line to try and find the correct bracket. I found what I thought was the right bolt on bracket from Rough Stuff Specialties. Less than $100.00 so I ordered them and they shipped right away and the next weekend I was back working on the truck. But this time the mistake was mine in that I thought if it’s designed for a Dodge Dana 70 it will fit a Dodge Dana 60 no problem. After all, how different can they be? Right? Wrong. These brackets moved the caliper to far back and the only way to get the caliper to fit the rotor was to mount it incorrectly which would make the caliper bolts to short. Here is how that looked.
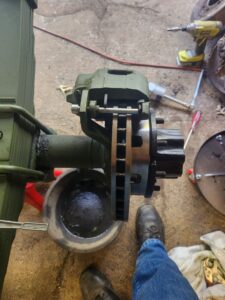
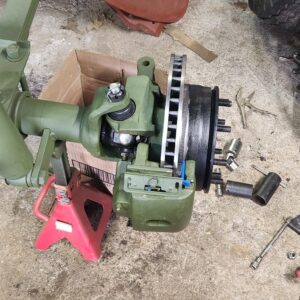
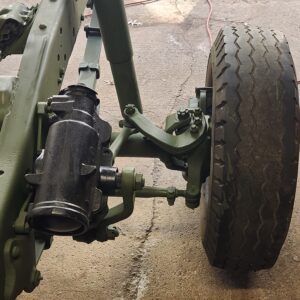
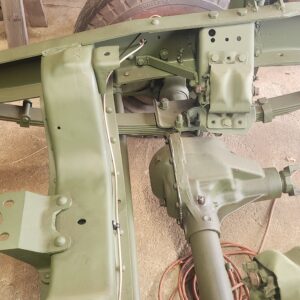
So, I contacted the folks at Rough Stuff and they were great. Very helpful, we talked through things and it came down to they didn’t make a bracket that was bolt on for the Dana 60 Dodge axle, but they did have a weld on bracket that they could sell me. We worked out an RMA for me to return the Dana 70 brackets after I cleaned the OD paint off them and I said I would think about the weld on bracket. Well, I slept on it all night and I woke in the morning thinking ‘ya know I could take the original brackets and modify them to weld onto the axle and also widen the opening so that the caliper fit better and make those work. So, that’s what I did. I modified the brackets and welded them onto the axle and then bolted up the calipers and all is well. Here are the end results.
January 2023
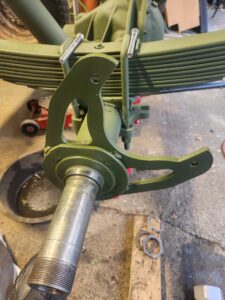
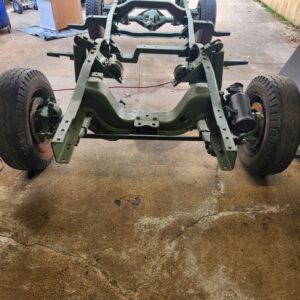
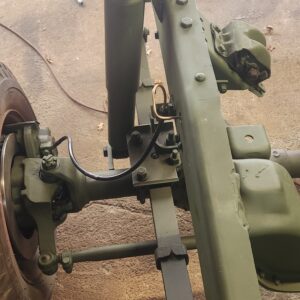
So the winter cold has set in and I can’t get as much done in the shop as I would like but, I have been doing a little bit here and there. I finished up the rear axle. I installed new gaskets on the axle shafts and I installed a new gasket on the diff cover. I also installed a new front pinion seal to finish the axle up. The ring and pinion looked real good and the oil was old but clean. I just need to put new oil in it which I will do once it warms up again in about 90 days. In the mean time between getting through the holidays and trying to figure out how the front axle works I got the drivers side of the front axle rebuilt. I installed new u-joint on the axle shaft. New grease seals, new inner and outer bearings, new rotor, new caliper and new brake pads. I also installed new upper and lower ball joints, and a new drag link. Some of the parts got painted when we had a warm snap or 55-60 degree temps, but because it now is below 50 most days are in the upper 30’s or lower 40s some things didn’t get painted like the caliper and rotor. Those will get done once it get’s warm again or if we get a warm spell this winter. I just need to grease up the drag link, upper and lower ball joints, the u-joint and the bearing retainer. If you’re not familiar with the 1976-1979 Dodge Dana 44 front axle…let me tell you about it. You can keep your bearings lubed through a hole in the rotor. There is a grease fitting in the bearing retainer that you put your grease gun through the hole and onto the fitting and then pump grease into it to lube the inner and out bearings in the steering knuckle. Kind of slick, but kind of a pain in the you know what. This side was my learning side. The passenger side should go a lot faster, but I may wait till warmer weather come my way before I start on the passenger side. I’m sorry I didn’t take any picks along the way of the front axle rebuild I’ll try to on the other side. Anyway here is a pick for you all.
August 2023 Been prodding along with doing little things on the truck. Not much to write about. I did finish the front axle and got is all set. All new seals, wheel bearings, new upper and lower ball joints and new tie rod ends. Here are a few pics of that.

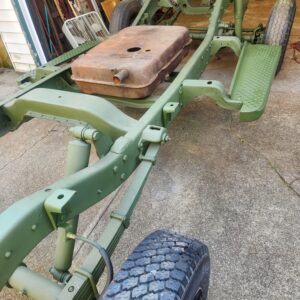
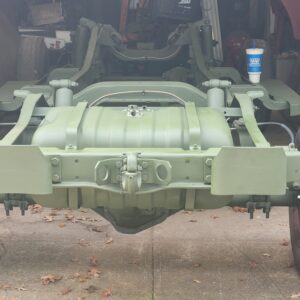
I have been doing a lot of figuring out the next steps and getting some things things accomplished towards those next steps. When those steps are completed I will post those things and show you what has been done. In the mean time I did finish up cleaning up and installing the running boards and the bed mounting brackets and got those mounted to the frame. I also have started working on the brake lines by designing a new bracket for the flexible brake hose going to the rear calipers. This is very similar to how the brake hoses mount on my 2018 Ram 1500, so, trying to bring a little more modern touches to the truck.
Fall 2023
Inside my original tank was full of rust, dirt, rocks, you name it. To have it restored at a tank renewal place was going to be between 600-700 bucks. Do try it myself with muriatic acid and Redkote sealer would have cost about 300 buck and no guarantee that it was truly sealed and in good nick. To do it properly I would have had to cut the tank apart. Media blast inside and out and the weld back together. I’m an okay bugger welder. My welds hold but are not pretty. Plus I doubt they would have sealed the tank properly.
I started looking around for a replacement tank. A lot of folks used a tank out of an S-10 blazer and it’s close in size, but the s-10 tank is only 18 gallons and it has a corner cut off of it.
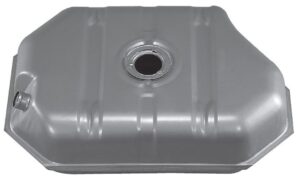
I then started looking for a tank that was close to size and found the tank out of a 1980 Ford Bronco was almost perfect in size except that it was a little taller by about 4 inches but otherwise almost an exact match to the M37 tank. This tank is a length of 31.88 inches and a width of 22.25 inches and a depth of 12.75 inches. This tank is 25.5 gallons. This tank only cost me $89.00. I think with shipping and a few other things I’m all total in at around $120.00 for it.
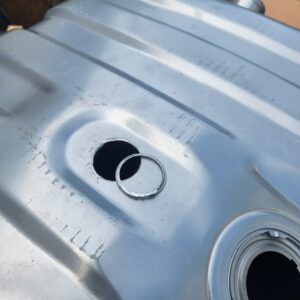
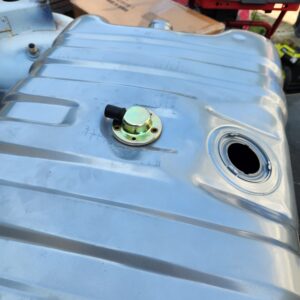
So, the first thing I had to do was modify the hole that I wanted to put the GI fuel sender into. I used a hole saw and clamped a piece of wood in the opening to pilot the saw and cut the opening to the same size and the original sending unit.
I then drilled and tapped the holes for the sending unit to bolt down to the tank.
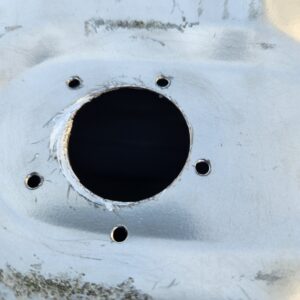
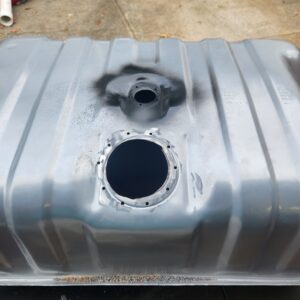
I then had to enlarge the hole for the fuel pickup. Again, I used a hole saw and some wood to guide the saw and I cut the opening bigger for the fuel sender. I also drilled and tapped the mounting holes.
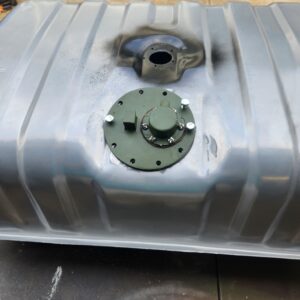
I then took the shop vac and cleaned the inside and out of all metal shavings. With that large opening it was easy to see and get in and clean everything up. I modified the sender by bending the arm down so that it would drop lower into the tank and I took apart the fuel pick-up and put a new 5/16 tube on it and a fuel strainer from a mid-80’s Chevy truck.
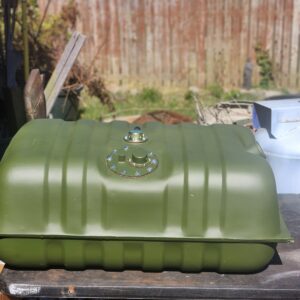
I then painted the tank and assembled.
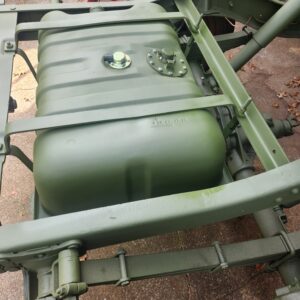
The next thing I had to do was modify the tank straps for the truck. Since this tank is 4 inches taller I had to make straps that where 4 inches longer. I got 1/8 flat stock at Home Depot and I ground off the threaded rod/ bolt on the one end and attached it to the other end and then welded them on and painted them up. Here are the straps I made installed in the truck.
Then I installed the tank.
Advantages are that I get a brand-new tank for a lot less money than restoring the original. Because I’m switching to a diesel motor I would have had to modify the fuel pickup anyway so to me it’s a win.
Disadvantage is once the bed gets installed (God only knows when that will be) the access panel for the fuel tank will probably not line up that well with the new stuff and the filler neck may need a little extra curve in it, but hey that’s all part of the restomod process right? Also, there is no drain plug to drain the tank like on the original.
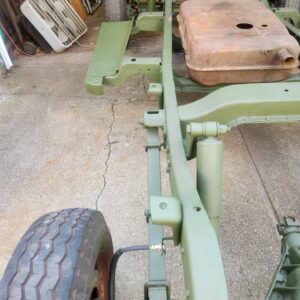
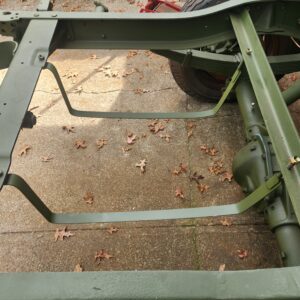
I got the brake lines run on the frame. I used 3/16 copper nickel brake line. It’s a modern line that is easy to bend and holds up to the weather. I started with picture wire that I ran as I wanted the line to run. This gave me a template to follow.

I then cut the line to length and bent them up and installed on the frame.
I have since put rubber grommets around the line where they go through the frame to protect them from rubbing against the frame.
Stay Tuned more to come in this never ending saga…. 🙂